
Classes
The Classes section allows you to create, configure, and manage all classes in your school, and to decide which teacher takes which subject in each one.
Accessing Classes
- Click Classes in the sidebar navigation
- View all classes
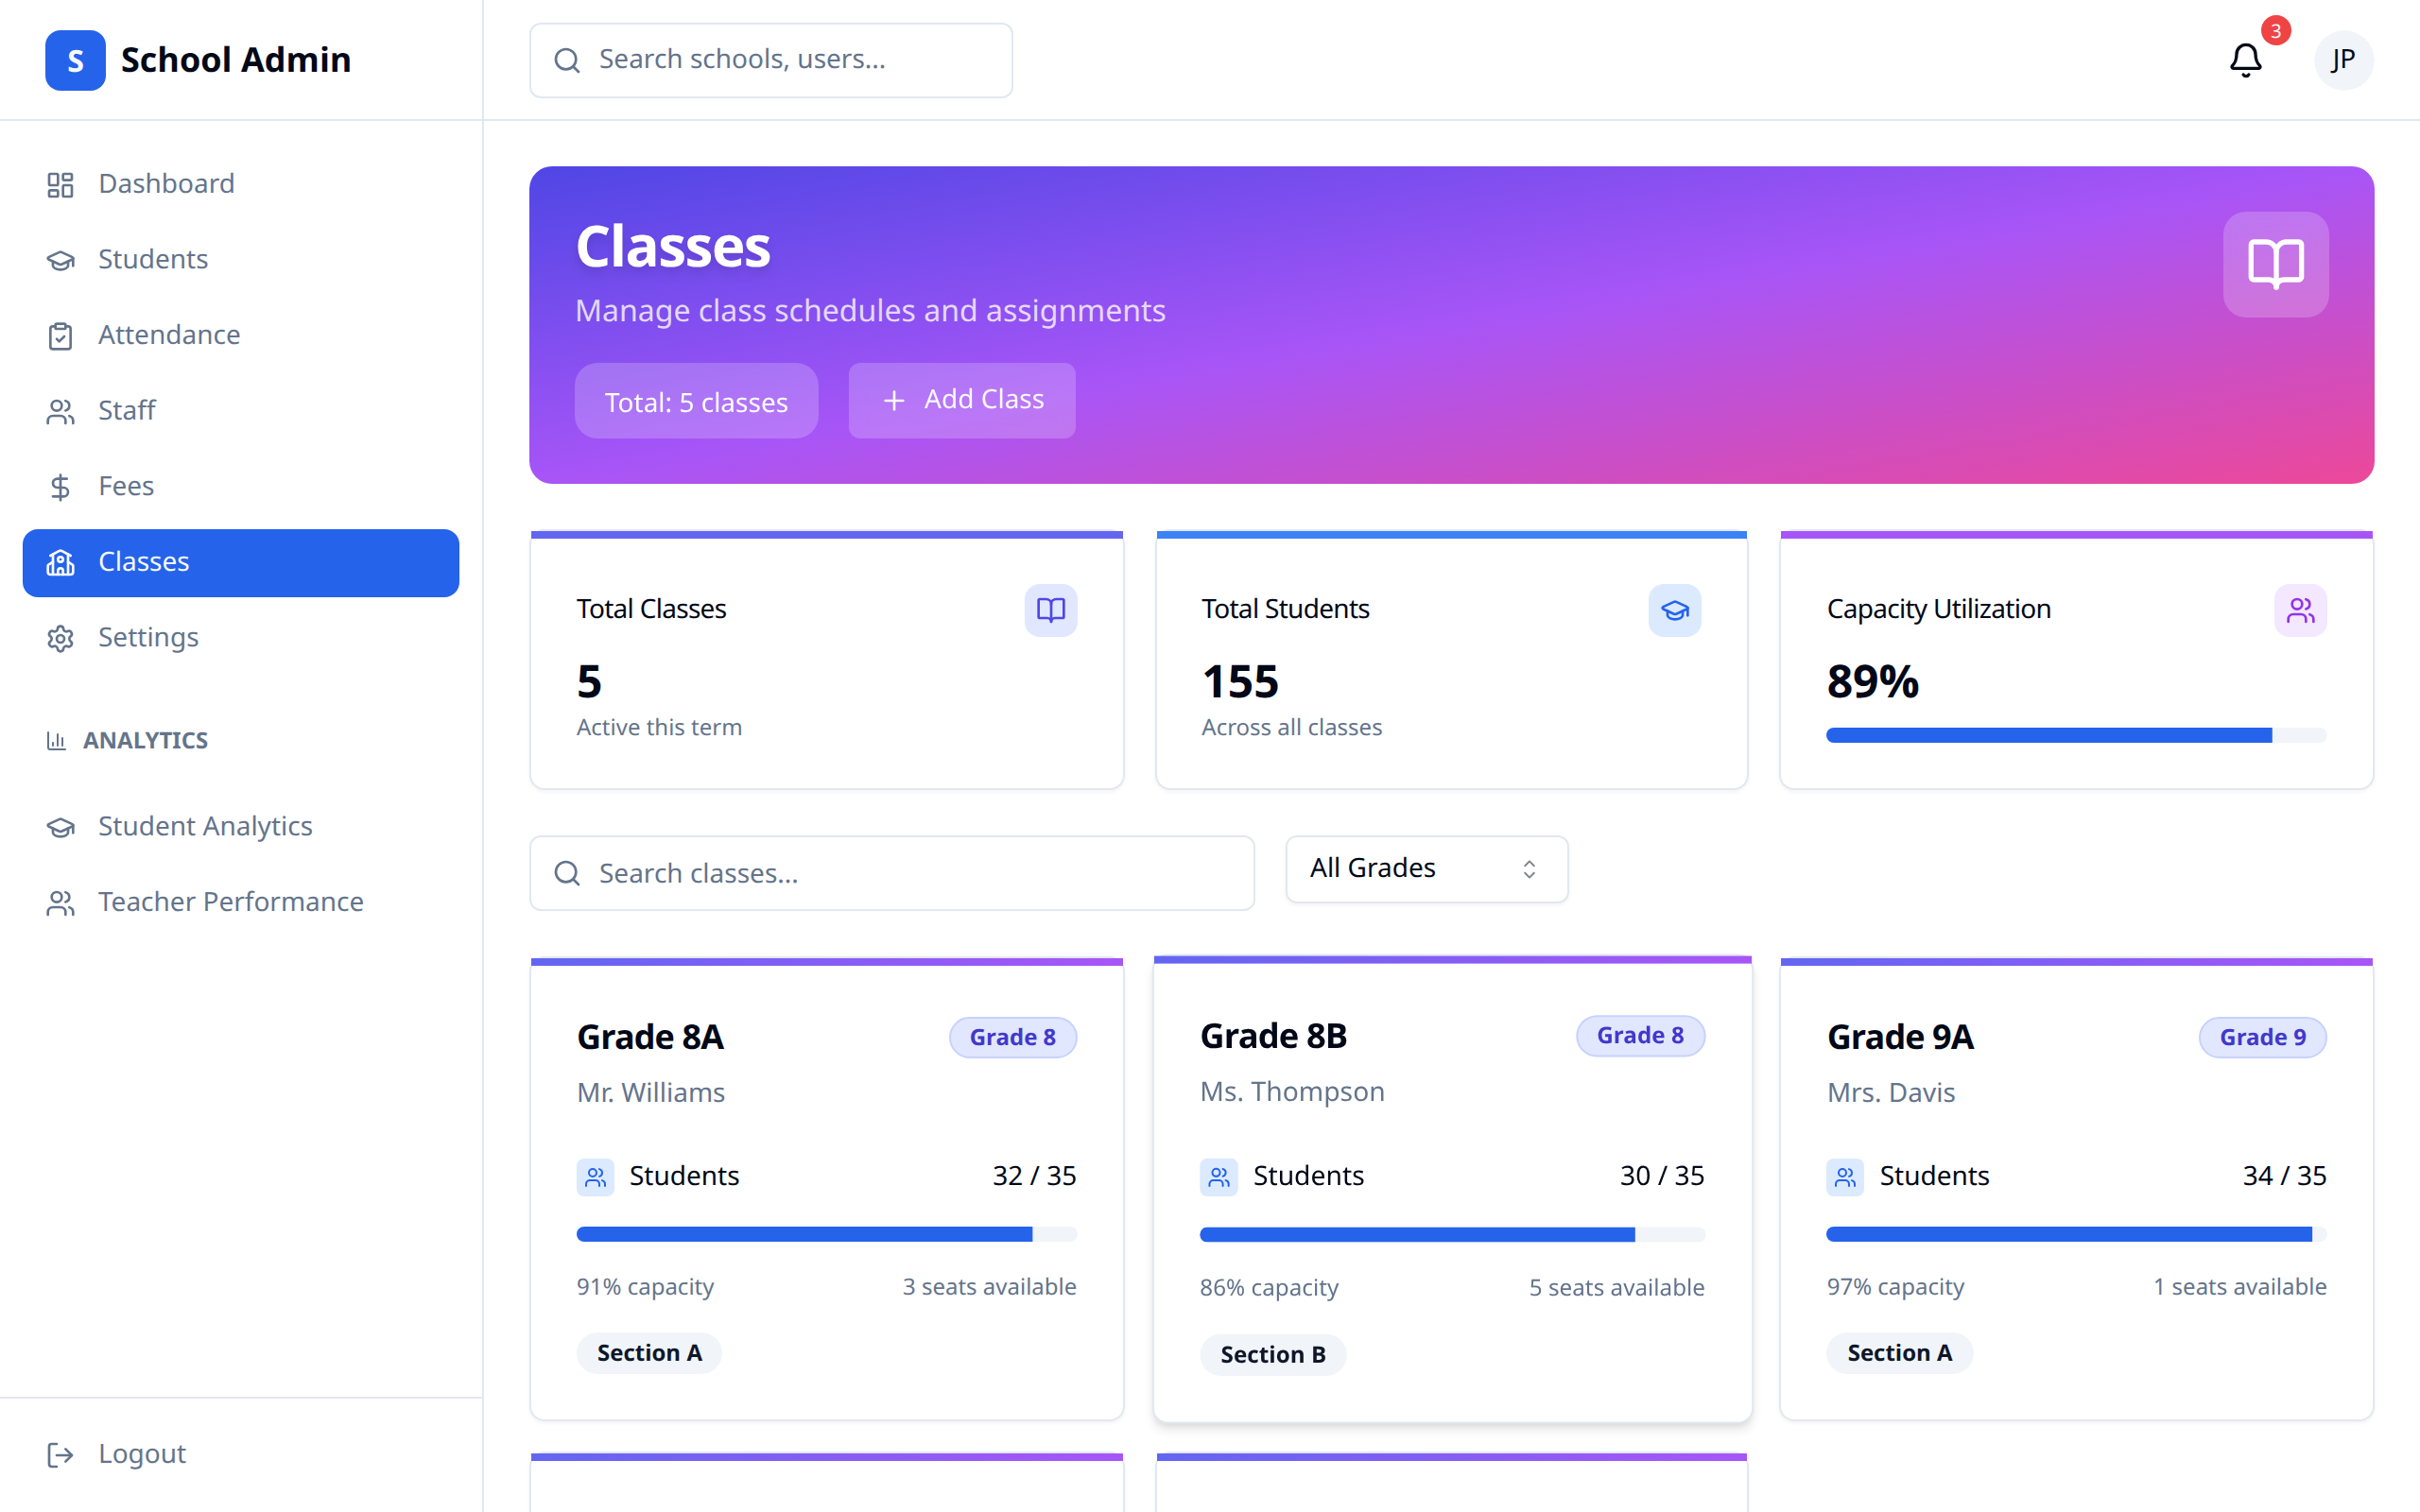
Classes Overview
Summary cards
Three cards sit above the list:
| Card | Shows |
|---|---|
| Total Classes | How many classes exist |
| Total Students | Students across all classes |
| Capacity Utilization | Students as a percentage of total capacity |
Class cards
Each class is a card showing its name, grade level badge, homeroom teacher (or "No homeroom teacher"), students against capacity, a capacity bar, and how many seats are available. Clicking a card opens the class.
Searching and filtering
Use the Search classes... box, and the Grade dropdown to narrow to a single grade level.
Creating Classes
Adding a New Class
- Click Add class
- Fill in the dialog
- Click Create class
Class Details
| Field | Required | Description |
|---|---|---|
| Name | Yes | e.g. "Grade 4A" |
| Grade level | Yes | e.g. "Grade 4" |
| Academic year | Yes | Defaults to the current year |
| Capacity | No | Maximum students, 1–1000, defaults to 30 |
Bulk import
Click Bulk import to create many classes at once from a CSV instead of one at a time.
- Click Choose CSV file and pick your file
- Fix and re-upload if a Missing required columns warning appears
- Check the preview table (first 10 rows) showing how many rows are ready
- Click Import N rows
| Column | Required | Notes |
|---|---|---|
name | Yes | Class name, e.g. "Grade 5A" |
gradeLevel | Yes | e.g. "Grade 5" |
academicYear | Yes | e.g. "2026" |
capacity | No | Number of seats |
classTeacherEmail | No | Must match an existing staff member's email — sets them as homeroom teacher |
Click Sample CSV on the page for a ready-made template. A row is skipped (not duplicated) if a class with the same name and academic year already exists. After importing, you'll see how many rows succeeded and, for any that failed, the reason next to the row number — fix those rows and re-upload just those.
TIP
Bulk import only creates the classes themselves. Head into each class's Subjects & teachers tab afterward to map subjects and teachers.
Managing Classes
Editing a Class
- Click the ⋯ menu on the class card
- Choose Edit
- Update the details
- Click Save changes
Deleting a Class
Choose Delete from the ⋯ menu and confirm. Students assigned to that class are unassigned, and the deletion can't be undone.
Inside a Class
Click a class to open it. The page has five tabs, plus Class analysis and Mark sheet buttons in the header that jump to the analytics for that class.
Overview
Read-only basics: Name, Grade level, Section, Academic year, Capacity, Homeroom teacher. To change the name, grade level, academic year, or capacity, go back to the class list and use Edit from the ⋯ menu; to change the homeroom teacher, use the Subjects & teachers tab below.
Roster
The students enrolled in the class, with their names and admission numbers. Students are added to a class from the Students page, or via CSV import. If nobody is enrolled yet, this tab just says so.
Subjects & teachers
This is where you decide who teaches what.
- Set the Homeroom teacher at the top — the class or register teacher. This saves as soon as you pick someone.
- In the table below, pick a teacher for each subject. Use the search box in the dropdown to find someone quickly.
- Click Save
Leaving a subject Unassigned means nobody can enter grades for it yet. Each row also has an Analyze button that opens the analysis for that class-and-subject combination once the subject is linked to the class.
TIP
Subjects come from the Subjects page in the sidebar, where you add each subject with a name, code, and the grade levels it applies to. If the table here is empty, add subjects there first. If no teachers appear, add staff first.
Student enrolment
By default every student in the class takes every subject assigned to it. This tab is for the exceptions.
- Each cell is ticked when the student takes that subject
- Untick a cell to mark that the student is not taking it
- Click Save enrolment
A student you untick disappears from that subject's gradebook, and the subject won't appear on their report card. The button stays disabled until you change something, and the tab shows how many exceptions are currently configured.
If the class has no subjects linked yet, this tab tells you to set them up in Subjects & teachers first. If the class has no students, it says so instead of showing an empty grid.
Courses
Assign self-paced courses to the class. The Course dropdown only lists published courses not already assigned to this class. Pick a Course, optionally set a Due date, and click Assign. Assigned courses show up for that class's students in their own dashboard.
For each assigned course you can change the due date, Hide it from students (then Activate it again), or remove the assignment with the trash icon.
Timetable
Weekly class schedules — which subject and teacher meet when — live on their own page. See Timetable for the full walkthrough. In short: pick a class, add day/time/subject-teacher/room slots, and they show up grouped by day. A class's slots can only reference subjects already linked to it on the Subjects & teachers tab above.
Best Practices
- Plan ahead - Set up classes before term starts
- Balance sizes - Watch the capacity bars
- Complete assignments - Every subject needs a teacher before grades can be entered
- Set the homeroom teacher - it appears on the class card and in reports
- Handle exceptions early - Mark non-taken subjects before grade entry starts